After you’ve completed the port mapping setup, you must create a new command center project file that contains the correct controller IP and Port mapping addresses in order to pass the communication through the port sharing service.
1. In windows explorer, make a copy of your command center (*.ntp) file and name it something else like network_mapped.ntp so that you will be able to discern which file is which.
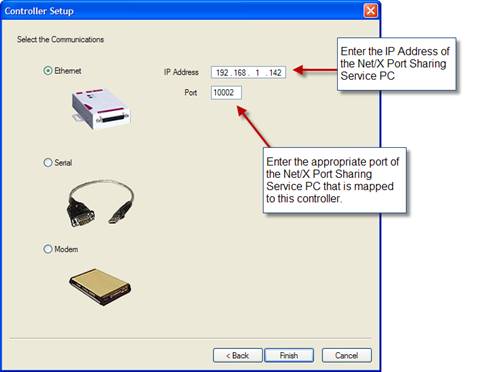
2. Select each controller and point the IP address and port number to the port sharing PC. Make sure the port matches the correct port mappings to the actual NetworkThermostat controller. See controller setup options below:
For example, for the following controller settings in the Command Center software would be modified to point to the port sharing PC (192.168.1.100) using unique ports for each controller instead of unique IP addresses:
|
Controller Name |
Old Settings (Controller IP:Port) |
New Settings (Port Sharing PC:Port) |
|
Controller 1 |
192.168.1.1:10001 |
192.168.1.100:10002 |
|
Controller 2 |
192.168.1.2:10001 |
192.168.1.100:10003 |
|
Controller 3 |
192.168.1.3:10001 |
192.168.1.100:10004 |