The easiest way to bring in your UP/RP thermostats is to create a NetX-IP Command Center project that includes all your UP/RP thermostats. Verify that all your thermostats are online prior to importing into Events2HVAC.
To make configuration easier, you should assign the same user/password to each thermostat.
Important: Make sure you don’t leave your Command Center project running and online while you are using Events2HVAC. This PC software will block any communications to the thermostats while it is running.
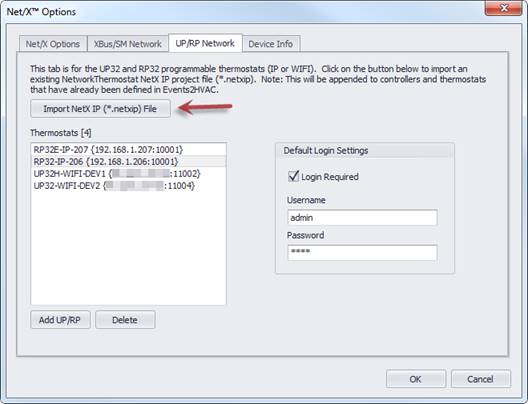
1. Select the UP/RP network tab and click the button to import the *.netxip NetX-IP command center project file. Your thermostats will show up in the thermostat list.
You can optionally add each thermostat individually by clicking the “Add UP/RP” button.
2. If you have the same user/password for each thermostat, fill in the default login settings.
3.
Double-click on each thermostat and click on the “Test” button. This will
verify communication with the thermostat and interrogate it for various
properties and features. You can also rename it to something
different.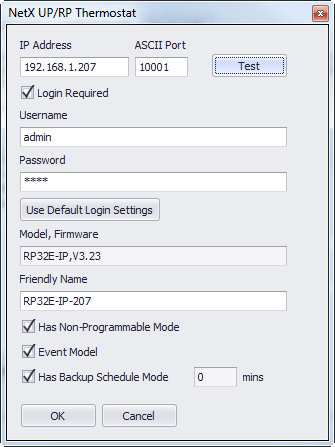
Important: If you don’t test the thermostat, some features may not be available to you until you successfully interrogate the thermostat.
4. You are ready to start defining equipment and actions for your thermostats.