After the installation of Events2HVAC, you will need to configure the Network Thermostat network.
1. Open the E2H client.
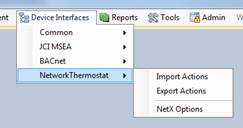
2. Select Device Interface à NetworkThermostat àNetX Options. (note: if you don’t see this option, either you didn’t load the NetX interface during setup or you need to re-discover your devices using Device Interface Manager.
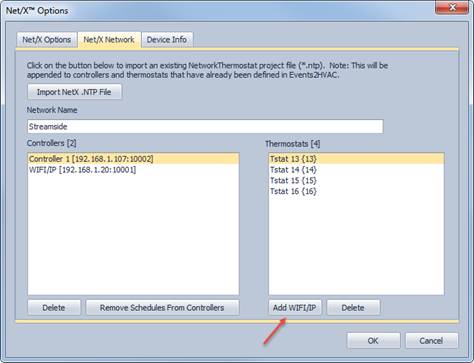
3. On the
Net/X Network Tab, import the re-mapped Command Center project file
(re-mapped to NetX Port Sharing service). See Changing your
NetworkThermostat Command Center project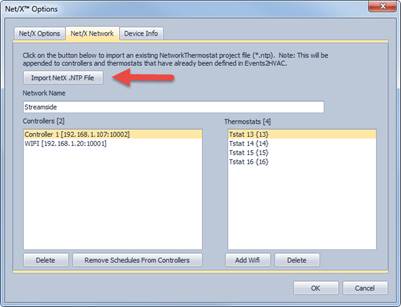
Select the .NTP file…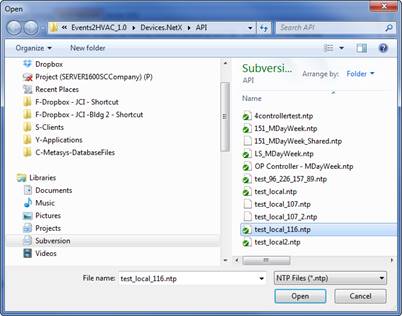
3. Verify all controllers and thermostats come in and are correct.

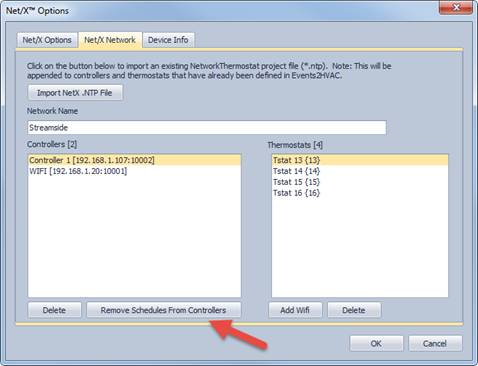
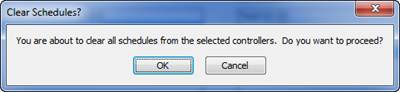
4. Optional: Select the controllers in the list and click on the “Remove Schedules From Controllers” button to clear out any existing schedules that were defined in Command Center. This will ensure that residual schedules in the controllers won’t conflict with commands issued from Events2HVAC.
Warning: If you do not clear out existing schedules, you may have conflicts between schedules in NetX and commands that are issued by E2H.
5. If you have stand-alone WIFI or IP thermostats that you want to include, add each one manually by hitting the “Add WIFI/IP” button. Enter the IP address, ASCII Port and a name for each one.
See also: Stand-Alone WIFI/IP Thermostat Setup
You’ll see the NetX WIFI/IP Thermostat dialog as shown below. Fill in the appriopriate information for the thermostat. The test button will verify communications.
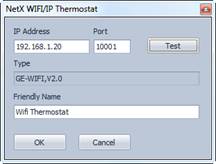
Note: You must disable the ASCII login option on your thermostat’s configuration page before commands from E2H can be sent. See the Stand-Alone WIFI/IP Thermostat Setup section.
6. On
the Net/X Options tab, enter the default settings for thermostats and other
general settings. 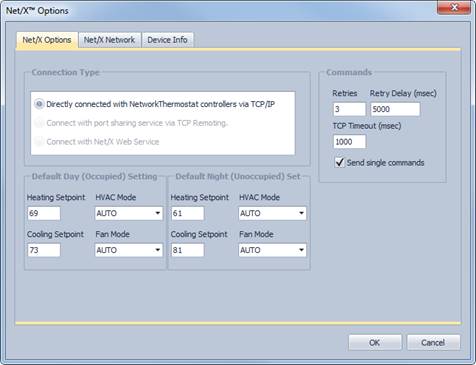
7. Test the connection. If it is successful, you are ready to start adding equipment.